本文共 3089 字,大约阅读时间需要 10 分钟。
Aside from the traditional method of sending a Microsoft Word document to others as an email attachment, you can also upload and share your document from the cloud. All you need to get started is an OneDrive account. Here’s how.
除了将Microsoft Word文档作为电子邮件附件发送给其他人的传统方法之外,您还可以从云上载和共享文档。 您只需要一个OneDrive帐户即可开始使用。 这是如何做。
Saving a Word document to the cloud is easy and only requires a few steps on your end. To achieve this, though, you’ll need an OneDrive account. If you’re a Microsoft 365 or Office 365 subscriber, then you already have one. If not, and sign in to OneDrive.
将Word文档保存到云中很容易,并且只需要执行几个步骤即可。 但是,要实现这一点,您将需要一个OneDrive帐户。 如果您是Microsoft 365或Office 365订户,则您已经拥有一个。 如果不是,请然后登录到OneDrive。
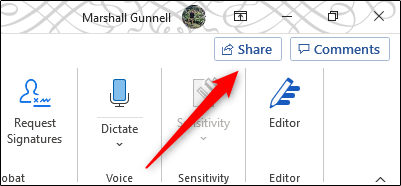
Once you’ve gotten your OneDrive account set up, open the Word document that you’d like to share. Once open, select the “Share” button, located in the top-right corner of the window.
设置好OneDrive帐户后,打开要共享的Word文档。 打开后,选择位于窗口右上角的“共享”按钮。
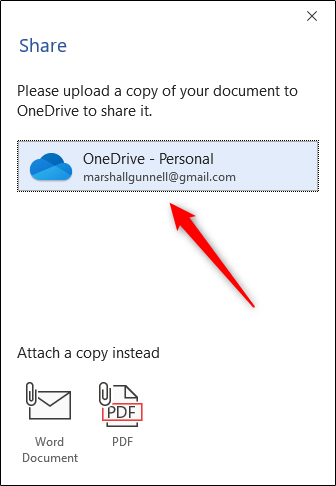
Once selected, the “Share” window will appear. There are a few options to choose from here. In the “Attach A Copy Instead” group, you can choose to send your document as a Word or PDF attachment. If you select either of these options, your default email client will open with the file set as an attachment.
选择后,将显示“共享”窗口。 这里有一些可供选择的选项。 在“附加副本”组中,您可以选择将文档作为Word或PDF附件发送。 如果您选择这些选项之一,则默认电子邮件客户端将打开,并将文件设置为附件。
What we’re interested in though is . To do this, Select your “OneDrive” account under “Share.”
不过,我们感兴趣的是 。 为此,请在“共享”下选择您的“ OneDrive”帐户。
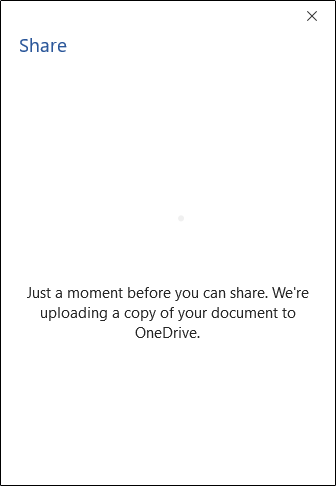
Once selected, Word will begin uploading a copy of your document to OneDrive. This could take a few moments depending on the .
选择后,Word将开始将文档的副本上载到OneDrive。 根据的这可能需要一些时间。
The “Send Link” window will appear once the document is finished uploading. By default, anyone with the link can edit. If you’d like to change this setting, select the “Anyone With The Link Can Edit” box.
文档上传完成后,将出现“发送链接”窗口。 默认情况下,具有链接的任何人都可以编辑。 如果您想更改此设置,请选择“知道链接的任何人都可以编辑”框。

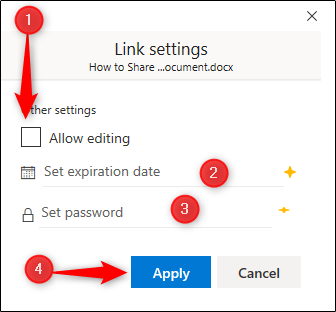
In the next window, uncheck the box next to (1) “Allow Editing” to remove the privilege. This renders the document read-only. You can also (2) set an expiration date, and/or (3) set a password to improve the security of the document. Once you’ve adjusted the settings, select “Apply.”
在下一个窗口中,取消选中(1)“允许编辑”旁边的框以删除特权。 这将文档设为只读。 您也可以(2)设置到期日期,和/或(3)设置密码以提高文档的安全性。 调整设置后,选择“应用”。
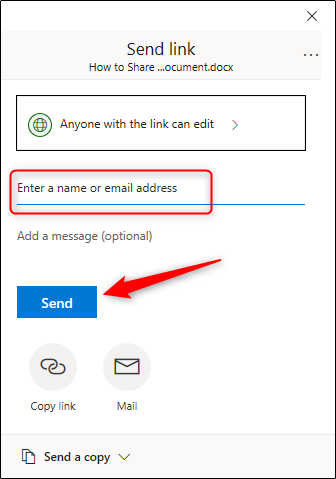
Finally, enter the email address of the recipient and click “Send.”
最后,输入收件人的电子邮件地址,然后单击“发送”。
The recipient will receive an email providing access to the document. Please be sure to check your spam folder if you’re the recipient of the invitation, as it sometimes gets flagged.
收件人将收到一封电子邮件,提供对文档的访问权限。 如果您是邀请的接收者,请确保检查您的垃圾邮件文件夹,因为它有时会被标记。
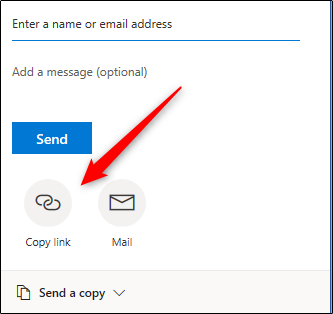
Alternatively, you can copy the share link and send the link directly to the recipient on a chat app such as or . To do this, select the “Copy Link” option.
或者,您可以复制共享链接并将该链接直接发送到聊天应用程序(例如或上的收件人。 为此,请选择“复制链接”选项。
In the next window, select “Copy.”
在下一个窗口中,选择“复制”。

The link is now copied to your clipboard and ready to be shared. Once the recipient receives the link, they will be able to access the document.
现在,链接已复制到剪贴板,可以共享了。 收件人收到链接后,他们将可以访问文档。
翻译自:
转载地址:http://twzwd.baihongyu.com/